The hardware and bandwidth for this mirror is donated by METANET, the Webhosting and Full Service-Cloud Provider.
If you wish to report a bug, or if you are interested in having us mirror your free-software or open-source project, please feel free to contact us at mirror[@]metanet.ch.
corazon allows you to incorporate easily colorffy gradient
colors within Shiny elements though it is principally designed for the
app’s body.
You can install the development version of corazon from
Github with:
install.packages("remotes")  # If not installed

remotes::install_github("feddelegrand7/corazon")By default corazon applies the color gradient on the
body of your shiny app:
library(shiny)
library(corazon)

ui <- fluidPage(

corazon_gradient(colorName = "PINEAPPLE", txtColor = "#1ED760"),

h1("This is a Title"),

)

server <- function(input, output) {}

shinyApp(ui = ui, server = server)
How do you find the gradient colors’ names ?
You can run available_gradients(): this will return
a data frame of the available gradient colors’ names along with their
respective hex codes.
You can visit the colorffy website
where you can find a catalog of the gradient colors. Just copy the names
and paste them within the corazon_gradient()
function.
You can incorporate gradients within many (not all) shiny element.
You just need to prefix the shiny element’s Id with a
#:
library(shiny)
library(corazon)

ui <- fluidPage(
corazon_gradient(colorName = "LOVE"),
corazon_gradient(element = "#txt", colorName = "PEACH", txtColor = "#4E5C68"),
corazon_gradient(element = "#txt2", colorName = "ROYAL", txtColor = "#4E5C68"),
corazon_gradient(element = "#btn", colorName = "COOL", txtColor = "#4E5C68"),
corazon_gradient(element = "#dbtn", colorName = "JUICE", txtColor = "#4E5C68"),
corazon_gradient(element = "#ninp", colorName = "CYBER", txtColor = "#4E5C68"),
corazon_gradient(element = "#date", colorName = "MELOCOTON", txtColor = "#4E5C68"),
corazon_gradient(element = "#navbar", colorName = "LANDSCAPE", txtColor = "#4E5C68"),


h1("This is a Title"),

textAreaInput(inputId = "txt",
              label = "This is textAreaInput ",
              height = "300px",
              width = "300px"),

textInput(inputId = "txt2", label = "This is a textInput"),

actionButton(inputId = "btn", label = "this is an actionButton"),

downloadButton(outputId = "dbtn", label = "This is a downloadButton"),

br(), br(),

numericInput(inputId = "ninp", label = "This is a numericInput",
             min = 0, max = 100, value = 10, step = 1), br(),

shiny::dateInput(inputId = "date", label = "This is a dateInput"),


)

server <- function(input, output) {}

shinyApp(ui = ui, server = server)
You can also use corazon in other shiny packages. In
this example, we applied color gradients into some
shinydashboard elements using their classes:
library(shinydashboard)
library(corazon)

ui <- dashboardPage(


  dashboardHeader(title = "Basic dashboard"),
  dashboardSidebar(),
  dashboardBody(
    corazon_gradient(element = ".box", colorName = "HUMMINGBIRD"),
    corazon_gradient(element = ".info-box", colorName = "VALENTINE'SDAY"),
    corazon_gradient(element = ".inner", colorName = "VALENTINE'SDAY"),
    fluidRow(
      box(title = "This is a box !",
          width = 6,
          plotOutput(outputId = "plot1")
        ),

      box(
        title = "This is another box",
        width = 6
      )
    ),

    infoBox(
      title = "This is an info box ! ",
      value = "some text goes here",
      width = 6),

    valueBox("This is a valueBox", subtitle = "some text goes here")
  )
)

server <- function(input, output) {

  output$plot1 <- renderPlot({

    hist(mtcars$mpg)

  })
}

shinyApp(ui, server)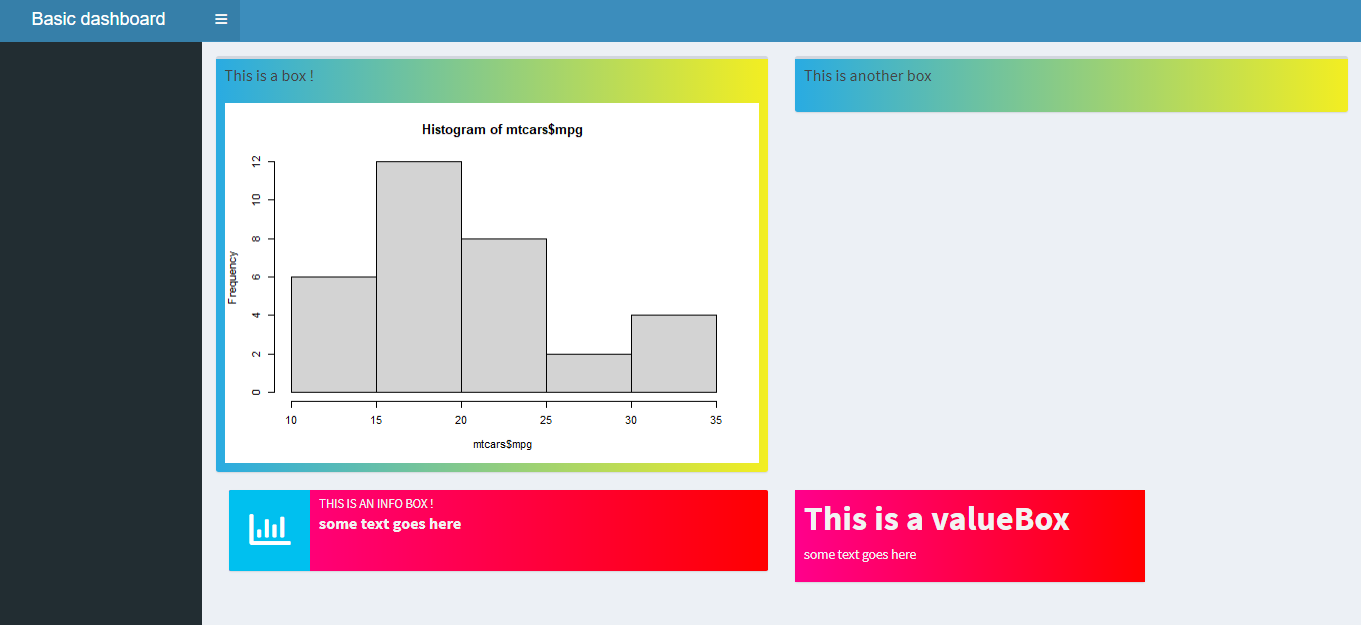
Please note that the corazon project is released with a
Contributor
Code of Conduct and made with ❤️. By contributing to this project,
you agree to abide by its terms.
These binaries (installable software) and packages are in development.
They may not be fully stable and should be used with caution. We make no claims about them.